Accurate o-ring sizing is essential for seal performance, longevity, and system reliability. Undersized or oversized o-rings can leak, wear out early, or fail under pressure. Knowing how to measure an o-ring accurately helps ensure better sealing, longer life, and fewer headaches.
To properly size an o-ring, you need three critical measurements: inside diameter (ID), cross section (CS), and outside diameter (OD).
Quick Guide to Measuring O-Rings
| Dimension | How to Measure Briefly | Best Tools | Why It’s Important |
| Inside Diameter (ID) | Measure from inner edge to inner edge, across the center. | calipers, Pi Tape / O-Sizer (for large IDs) | Ensures correct fit on shaft or bore; prevents stretch or looseness. |
| Cross Section (CS) | Measure the thickness of the o-ring material itself. | calipers (gentle touch), micrometer | Determines seal compression (“squeeze”). This is critical for seal tightness and longevity. |
| Outside Diameter (OD) | Measure across the center from outer edge to outer edge. | calipers, ruler | Useful way to check accuracy of other measurements; can be measured and derived from ID and CS. |
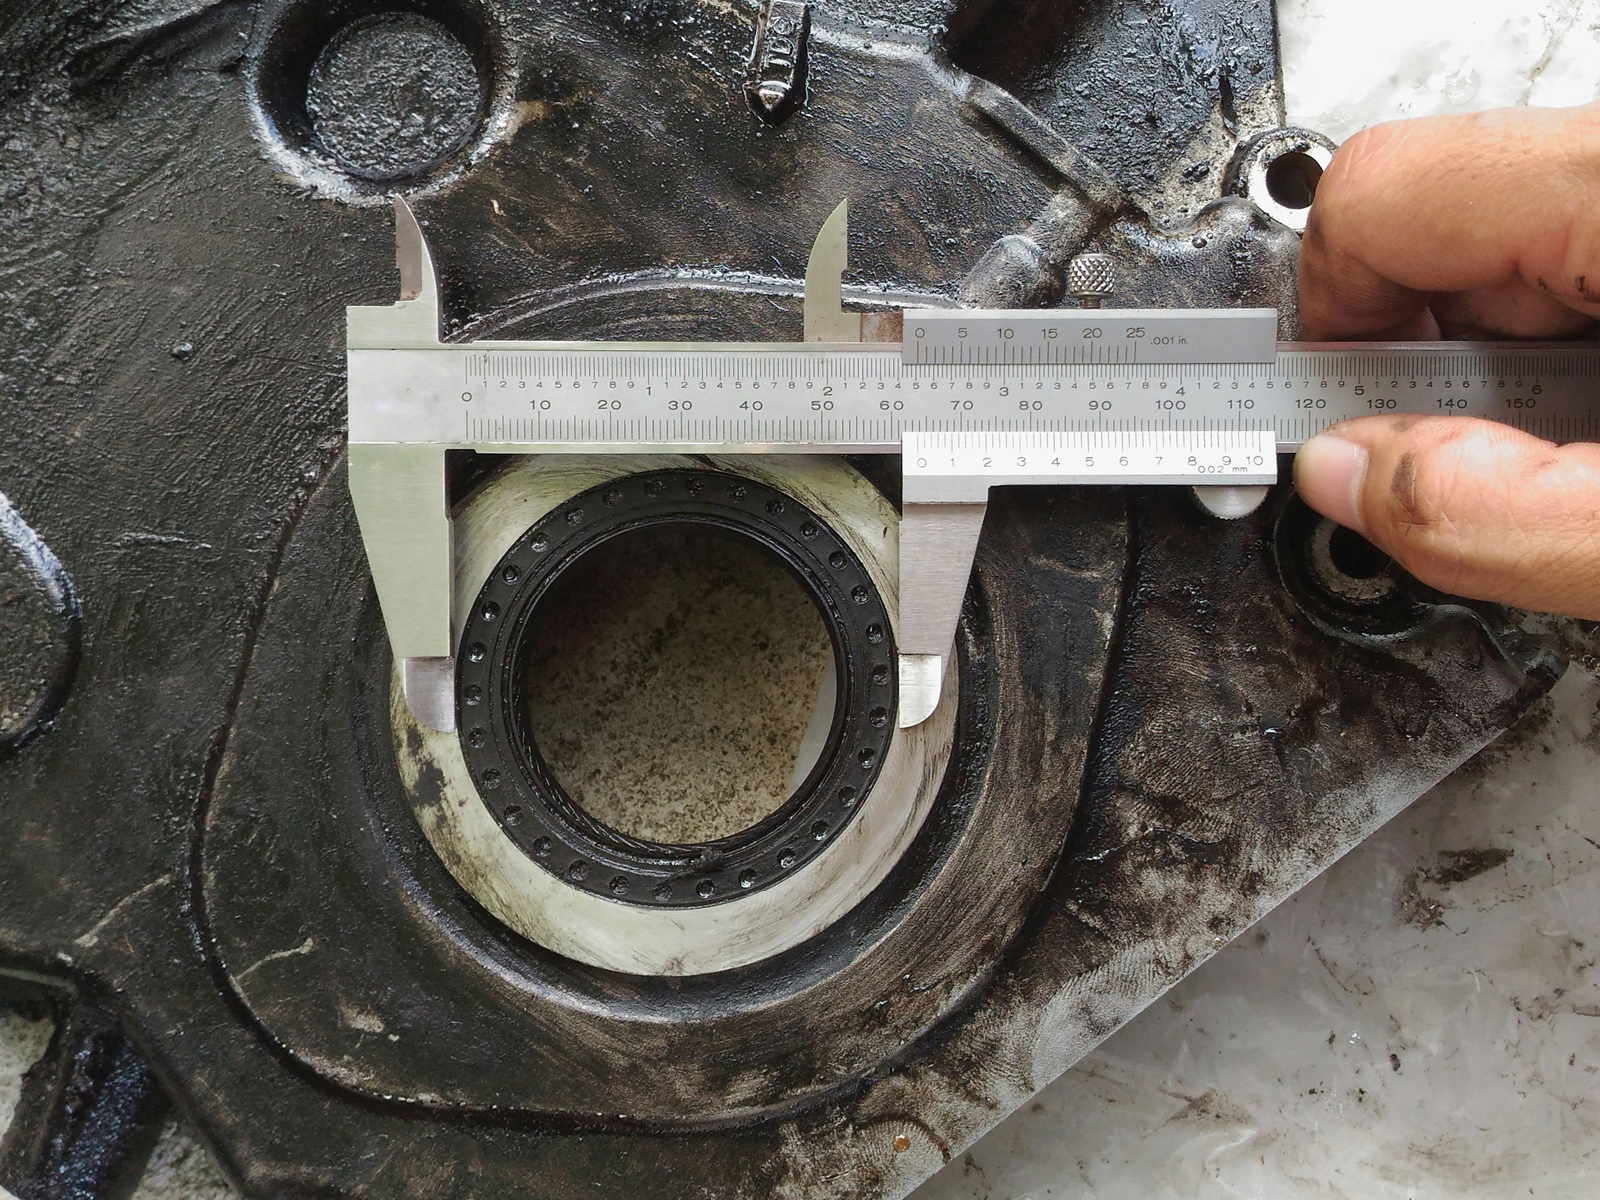
When possible, measure the hardware groove instead of the o-ring. This is more reliable when the o-ring is worn, swollen, or out of round. Marco’s groove design directory helps match groove measurements to standard sizes.
Measuring an O-Ring Using the 3 Key O-Ring Dimensions
There are three key measurements to ensure accurate o-ring sizing: the inside diameter (ID), cross section (CS), and outside diameter (OD). O-rings are predominantly measured from the inside. The outside measurement is used to confirm the ID and CS measurements.
While you can measure the o-ring itself, the best way to determine its size is through measuring a groove it fits in. As o-rings are flexible, it is easy to distort them while measuring.
Standard o-rings are frequently referenced by their ID and CS, as these are functionally the most important for selecting the correct o-ring size.
How to Measure an O-Ring’s Inside Diameter (ID)
The inside diameter determines how well the o-ring fits around a shaft or within a bore. If the o-ring is too small, the seal may stretch, overstress, or twist during installation. On the contrary, if an o-ring is too large, it can sag or leave gaps under compression.
How to Measure:
- Lay the o-ring flat on a clean, level surface.
- Measure from the inner edge to the opposite inner edge, straight across the center.
- Avoid pulling or stretching the o-ring while aligning for the measurement.
- For large or flexible o-rings, measure in at least two locations and average the values.
- If the o-ring is warped or difficult to align, use an ID-specific measuring tool like a Pi Tape or Marco’s O-Sizer.
When ID is Critical:
- Shaft sealing (dynamic or rotary applications)
- Where axial stretch must be minimized to avoid thinning the cross section
- When fitting into a precisely machined bore
How to Measure an O-Ring’s Cross Section (CS)
The cross section, or thickness of the o-ring cord, is the most important dimension for sealing performance. It affects compression, squeeze, and the contact stress required to form a leak-tight seal. Even small variations in CS can impact sealing pressure and life expectancy.
How to Measure:
- Place the o-ring between a caliper or micrometer with smooth, parallel jaws.
- Apply very light pressure. This should be just enough pressure to touch without deforming the rubber.
- Take at least two measurements at different points around the o-ring to check for wear or flattening.
- Use a micrometer for the most precise reading, especially with small CS sizes (e.g., under 1/16″).
Why CS Matters:
- Determines sealing force and compression.
- Affects the gland-fill ratio and the risk of over-compression or extrusion.
- Tighter tolerance requirements, especially in high-pressure or vacuum systems.
How to Measure an O-Ring’s Outside Diameter (OD)
The outside diameter is the total span from one outer edge to the other, across the center of the o-ring. While OD can be directly measured, it’s typically a calculated value, used to verify size or troubleshoot fit issues when ID or CS are uncertain.
OD Formula:
OD = ID + (2 × CS)
How to Measure:
- With the o-ring laid flat, use calipers or a flexible measuring tool to span from outer edge to outer edge through the midpoint.
- Avoid compressing the o-ring during measurement.
- Compare against calculated OD based on known ID and CS to verify sizing.
When OD Is Useful:
- Confirming dimensions when direct ID or CS measurements are compromised (e.g., worn, distorted seals).
- Cross-referencing against supplier catalogs and standard-size charts.
- Troubleshooting fit in fixed-gland applications.
O-Ring Sizing Formulas
The three primary dimensions of an o-ring are mathematically interrelated. These formulas allow for the calculation of one dimension if you know the other two measurements. This is particularly useful if one dimension is difficult to directly measure due to o-ring condition or application constraints. This can also help you verify your measurements.
- OD = ID + (2 × CS)
Used when you know the ID and CS. This is the most common sizing method for verifying part specs or matching to a standard AS568 size.
- ID = OD – (2 × CS)
Use this when the OD and CS are known but you can’t directly measure the ID (such as when the center is distorted or missing).
- CS = (OD – ID) ÷ 2
This formula is useful when the o-ring has a consistent circular profile but you’re working with OD and ID only. Cross section is especially important for compression and gland fill.
How to Measure a Cut or Damaged O-Ring
Even when an o-ring is broken, cut, or deformed, it can still provide enough dimensional information to identify a replacement if measured correctly. This process is especially useful for maintenance teams dealing with unknown seals from legacy equipment or aftermarket systems without part traceability.
Step-by-Step Method for Measuring a Damaged O-Ring
- Measure the Cross Section (CS)
- Identify the cleanest, most intact segment of the seal.
- Use a micrometer or caliper to measure the thickness of the o-ring cord.
- Apply minimal pressure to avoid distorting the measurement.
- Take two to three readings from different points along the seal and average them for accuracy.
- Measure the Length (Circumference)
- Lay the broken o-ring flat on a clean surface, without stretching or compressing it.
- Align both cut ends to create a straight line.
- Measure the total uncompressed length from end to end; this is your approximate circumference (C).
- Calculate the Inside Diameter (ID)
- Use the circumference value to find the diameter:
- Diameter ≈ Circumference ÷ π
- ID = (Length ÷ π) – CS
- This method subtracts one full cross section width from each side of the diameter to estimate the true inner diameter.
- Use the circumference value to find the diameter:
- Optional: Calculate the Outside Diameter (OD)
- Once ID and CS are known:
- OD = ID + (2 × CS)
- OD = ID + (2 × CS)
- Once ID and CS are known:
Application Tip
For seals that are excessively stretched, deformed, or flattened, it may be more reliable to measure the groove dimensions in the mating hardware. To do so, you can reference Marco’s groove design guide.
How to Measure an O-Ring for a Face Seal Fitting (ORFS)
O-Ring Face Seal (ORFS) fittings rely on precise compression of an o-ring within a machined groove on the flat face of the fitting. This type of connection is common in high-pressure hydraulic systems and fluid transfer assemblies where leak-free performance is critical.
Unlike standard gland-based seals, ORFS connections do not depend on axial stretch or radial compression. Instead, sealing effectiveness is entirely dependent on o-ring placement and groove geometry. This makes accurate groove measurement (not just o-ring measurement) essential.
Relying on the dimensions of a worn or compressed o-ring can lead to selection errors. O-rings in face seal fittings often take a compression set, deforming from their original size. For this reason, measuring the groove in the hardware is more reliable when identifying a replacement.
Key Groove Dimensions to Measure
When sizing for an ORFS application, the following groove dimensions provide the most accurate information:
- Groove Depth
Measure vertically from the flat face of the fitting to the bottom of the groove. This controls o-ring compression and sealing force. An overly deep or shallow groove can result in under-compression (causing leaks) or over-compression (causing seal damage). - Groove Width
Measure the horizontal span of the groove, parallel to the fitting face. This dimension ensures the o-ring sits within the gland without lateral pinching or room for extrusion. - Groove Diameter
Measure either the ID or OD of the groove, depending on where pressure is applied in the system. For most ORFS configurations where the male fitting face contains the groove and the female fitting compresses over it, the outside diameter of the groove is the critical reference point.
These measurements help identify the correct standard or custom o-ring size. Marco’s groove design guide offers engineering specs for common gland types, including face seals.
Finding the Right O-Ring
Once you’ve measured your o-ring or your fitting groove, you’re ready to select the right size and material. A few key reminders:
- Inside diameter (ID) and cross section (CS) are the two most important dimensions for sizing. OD is helpful as a verification check.
- CS affects everything from sealing pressure and squeeze to gland fill and extrusion resistance. Even small CS errors can lead to failure.
- Use groove measurements, not old o-rings, for face seals and compressed parts.
- For damaged or unknown parts, formulas can help you back-calculate dimensions from circumference or groove data.
Marco offers several sizing tools and technical resources:
- AS568 O-Ring Size Chart: Find standard U.S. inch sizes by ID and CS.
- Full O-Ring Size Index: Search global and custom size equivalents.
- O-Ring Material Quick Reference Guide: Match your size to a compound that meets your chemical, temperature, and pressure needs.
If your dimensions don’t match a standard size, Marco supports custom tooling and rapid prototyping backed by material expertise and application testing.
Need help confirming measurements or matching materials? Our technical team is ready to assist.
FAQs
How do you determine o-ring size?
To measure an o-ring, start with ID and CS if possible. Use the formulas above to verify or calculate OD.
Can I calculate o-ring ID from OD?
Yes, you can calculate an o-ring’s ID from its OD. Subtract two times the cross section from the OD to find the ID: ID = OD – (2 × CS)
How do you find the cross section of an o-ring?
To find the CS measurement of an o-ring, use the measured OD and ID: CS = (OD – ID) ÷ 2
Why does o-ring cross section matter?
An o-ring’s cross section determines compression, sealing force, and fit inside the groove. Even a small deviation in CS can cause under- or over-compression, leading to leakage or extrusion.
How can I replace an o-ring without a part number?
Measure the cross section and total length, then use the formulas above to calculate ID. Cross-reference with a size chart.
What if the o-ring is too damaged to measure?
If an o-ring is too damaged to accurately measure, you can measure the gland or groove directly. Then consult standard AS568 sizes or request support for a custom option.
Can a cut o-ring still be sized accurately?
Yes, a damaged or cut o-ring can still be accurately sized if you measure carefully and use the right formulas.